Stinger3カスタマイズ-SNSボタンを横左下表示から縦表示に変更する
公開日:
:
最終更新日:2015/01/18
2101_Stinger3カスタマイズ
環境
WordPress: 4.1
Stinger3: 20140327
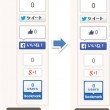
Stinger3をインストールした際の初期設定では、SNSボタンはサイトの左下に横長にSNSボタンが表示されています。
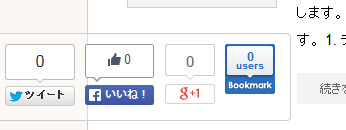
このままだとサイトが見づらいので縦長の表示に変更します。

直接親テーマのCSSを修正するか、子テーマを作ってCSSを修正します。
1. 縦長表示に変更する。
デフォルトのstyle.cssから.snsの記述を探します。
デフォルトだと644行目頃から始まります。
|
1 2 3 4 5 6 7 8 9 10 11 12 13 14 15 16 17 18 19 20 21 22 23 24 |
.sns { padding: 5px 5px 5px 5px; margin-left: -1px; bottom: 10px; position: fixed; border-radius: 0px 4px 4px 0px; /* CSS3 */ -moz-border-radius: 7px; /* Firefox */ -webkit-border-radius: 7px; border-top-width: 1px; border-left-width: 1px; border-bottom-width: 1px; border-right-width: 1px; border-top-style: solid; border-left-style: solid; border-bottom-style: solid; border-right-style: solid; border-top-color: #ccc; border-bottom-color: #ccc; border-left-color: #ccc; border-right-color: #ccc; background-image: url(images/a30.png); background-repeat: repeat; } |
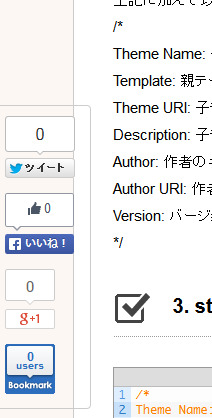
上記の.sns内に”width: 70px”を追記します。
|
1 2 3 4 5 6 7 8 9 10 11 12 13 14 15 16 17 18 19 20 21 22 23 24 25 |
.sns { width:70px; padding: 5px 5px 5px 5px; margin-left: -1px; bottom: 10px; position: fixed; border-radius: 0px 4px 4px 0px; /* CSS3 */ -moz-border-radius: 7px; /* Firefox */ -webkit-border-radius: 7px; border-top-width: 1px; border-left-width: 1px; border-bottom-width: 1px; border-right-width: 1px; border-top-style: solid; border-left-style: solid; border-bottom-style: solid; border-right-style: solid; border-top-color: #ccc; border-bottom-color: #ccc; border-left-color: #ccc; border-right-color: #ccc; background-image: url(images/a30.png); background-repeat: repeat; } |
この時点でこんな感じです。
2. 右側に移動する。
SNSボタンを縦長にしても、左側に記事があるサイトではブラウザが狭いとやはり記事にボタンがかぶってしまいます。
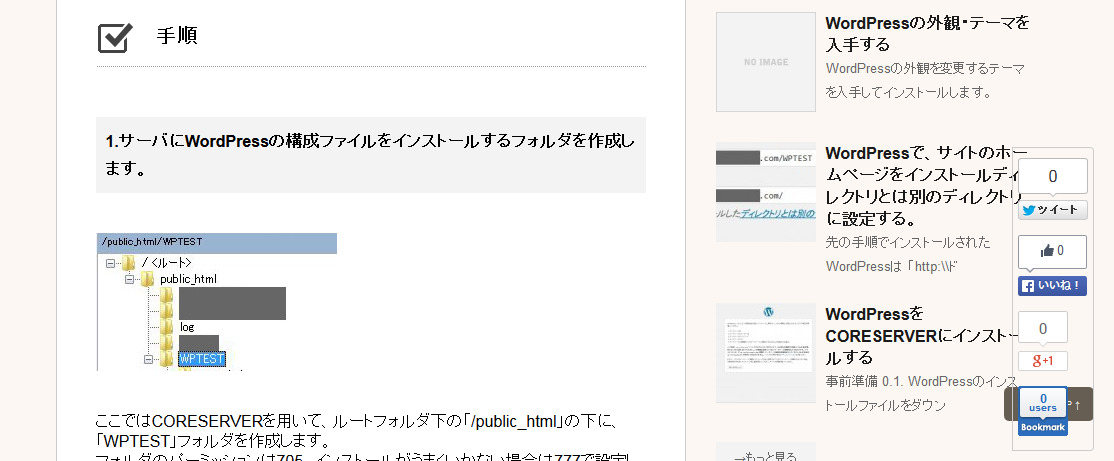
そこで、縦長にしたSNSボタンを右側に移動させます。
先ほどのソースに以下を追記します。
|
1 2 |
right: 20px; |
|
1 2 3 4 5 6 7 8 9 10 11 12 13 14 15 16 17 18 19 20 21 22 23 24 25 26 |
.sns { width:70px; padding: 5px 5px 5px 5px; margin-left: 1px; right: 20px; bottom: 10px; position: fixed; border-radius: 0px 4px 4px 0px; /* CSS3 */ -moz-border-radius: 7px; /* Firefox */ -webkit-border-radius: 7px; border-top-width: 1px; border-left-width: 1px; border-bottom-width: 1px; border-right-width: 1px; border-top-style: solid; border-left-style: solid; border-bottom-style: solid; border-right-style: solid; border-top-color: #ccc; border-bottom-color: #ccc; border-left-color: #ccc; border-right-color: #ccc; background-image: url(images/a30.png); background-repeat: repeat; } |
このようになります。
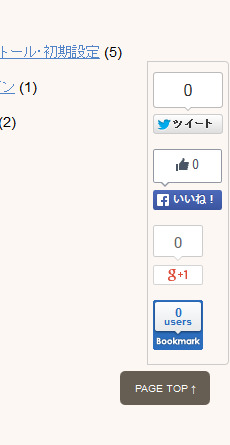
このままだと、”Page Top”のナビゲーションとかぶっているので、下部からの位置「bottom: 20px」を調整します。
それと、個人的にはブラウザの右側にくっついていてほしいので、「right: 20px;」の値も修正します。
|
1 2 3 4 5 6 7 8 9 10 11 12 13 14 15 16 17 18 19 20 21 22 23 24 25 26 |
.sns { width:70px; padding: 5px 5px 5px 5px; margin-left: 1px; right: 1px; bottom: 80px; position: fixed; border-radius: 0px 4px 4px 0px; /* CSS3 */ -moz-border-radius: 7px; /* Firefox */ -webkit-border-radius: 7px; border-top-width: 1px; border-left-width: 1px; border-bottom-width: 1px; border-right-width: 1px; border-top-style: solid; border-left-style: solid; border-bottom-style: solid; border-right-style: solid; border-top-color: #ccc; border-bottom-color: #ccc; border-left-color: #ccc; border-right-color: #ccc; background-image: url(images/a30.png); background-repeat: repeat; } |
3. ボックスのコーナーに丸みを帯びさせる。
Firefoxではボックスの右上と右下のコーナーが丸くなっています。
このまま右に移動させるとバランスが崩れるので左側に丸みを持たせるように修正します。
|
1 2 3 4 5 6 7 8 9 10 11 |
.sns { width:70px; padding: 5px 5px 5px 5px; margin-left: 1px; right: 1px; bottom: 80px; position: fixed; border-radius: 0px 4px 4px 0px; /* CSS3 */ -moz-border-radius: 7px; /* Firefox */ -webkit-border-radius: 7px; |
border-radius
-moz-border-radius
-webkit-border-radius
の、3行を修正します。
CSS3に対しては、border-radius、
Firefoxに対しては、-moz-border-radius
Chrome等に対しては-weblit-border-radius
がデザインに反映されます。
値は、『左上、右上、右下、左下』の順序で決められているので、
|
1 2 3 4 |
border-radius: 4px 0px 0px 4px; /* CSS3 */ -moz-border-radius: 4px 0px 0px 4px; /* Firefox */ -webkit-border-radius: 4px 0px 0px 4px; |
これで、ボックスの左側に丸みを帯びさせることができました。
4. ボタンを中央揃えに修正する。
ボタンを中央揃えにします。
|
1 2 3 4 5 6 7 8 9 10 11 |
.sns .snsb li { float:left; margin-right: 10px; list-style-type: none; } .snsb li { float:left; margin-right: 10px; list-style-type: none; } |
.sns .snsb li {
と
.snsb li {
中のfloat:left;を、float:none;に修正。
.sns .snsb li {に、
“text-align: center;”
を追記します。
|
1 2 3 4 5 6 7 8 9 10 11 12 |
.sns .snsb li { text-align: center; float:none; margin-right: 0px; list-style-type: none; } .snsb li { float:none; margin-right: 0px; list-style-type: none; } |
これでsnsボックスの各ボタンが中央揃いになりました。
…ただし、
このままだとfloat:none;が
『.post #snsbox03 .sns03 .snsb.clearfix {
padding-top: 20px;
padding-right: 0px;
padding-bottom: 20px;
padding-left: 0px;
}』
にまで影響して、記事の下のsnsボタンまで縦配置になってしまいます。
そこで、
|
1 2 3 4 5 6 7 8 9 10 11 |
.snsb li { float:none; margin-right: 0px; list-style-type: none; } #snsbox03 .sns03 li { float: left; margin-right: 10px; } |
#snsbox03 .sns03 li {
float: left;
margin-right: 10px;
この三行を追加します。
完了。
Page Topボタンの位置を修正したい・・・
AD
関連記事
-
-
Stinger3 – PAGE TOPボタンの位置を修正する
Stinger3デフォルトで表示される『PAGE TOP↑』ボタンの位置を修正します。
-

-
Stinger3カスタマイズ – SNSボタンを削除する
ついてくるSNSボタンを削除します footer.phpを編集します stinger3v